Understanding the Tevo Tarantula Fan Duct
The Tevo Tarantula is a popular 3D printer known for its affordability and ease of use. However, like any 3D printer, optimizing its performance requires understanding its components, especially the fan duct. The fan duct is a critical part of the printer’s cooling system, responsible for directing airflow to the printed object. Proper cooling is essential for achieving high-quality prints, preventing issues like warping, and ensuring dimensional accuracy. This guide will help you understand the importance of your Tevo Tarantula fan duct, and guide you to better prints. A well-functioning fan duct is a cornerstone of successful 3D printing, and the Tevo Tarantula is no exception. By understanding its purpose and potential issues, you can greatly improve your printing experience.
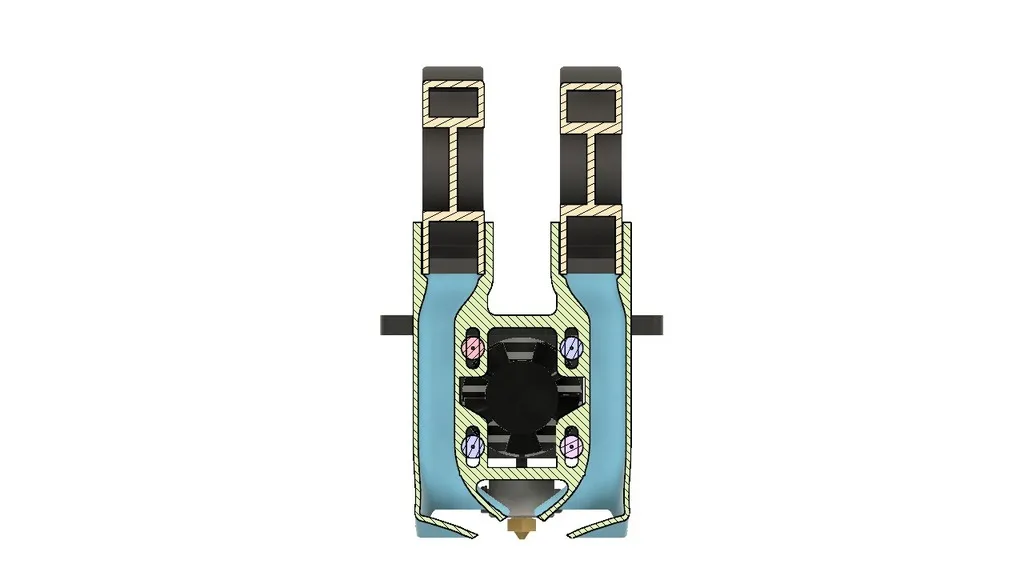
What is a Fan Duct?
A fan duct is a small structure, often made of plastic or metal, designed to channel the airflow from the cooling fan directly onto the printed part. Its primary function is to ensure that the extruded plastic cools quickly and evenly. A well-designed fan duct directs the airflow precisely to the critical areas of the print, such as the nozzle and the newly deposited layers. The fan duct’s design influences the quality of prints because the airflow helps the plastic solidify quickly and accurately, thus reducing warping, improving overhangs, and maintaining dimensional accuracy. Without a proper fan duct, the prints might suffer from poor layer adhesion, leading to weak or distorted objects. This component is vital in most 3D printers, and especially important to upgrade or optimize on a Tevo Tarantula.
Why is a Fan Duct Important?

The fan duct plays a pivotal role in maintaining the print quality on your Tevo Tarantula. Its role is crucial in 3D printing as it directs the airflow needed for solidifying the extruded plastic layers. Rapid cooling is critical to prevent issues such as warping, where the edges of the print curl up due to uneven cooling. Another common issue without effective cooling is poor layer adhesion, where the layers don’t bond properly, resulting in a weak and easily broken model. Moreover, a properly designed fan duct ensures accurate dimensional fidelity, allowing complex geometries and fine details to be printed without distortion. In essence, the fan duct is not just an accessory but an essential component that directly impacts the overall quality and reliability of your 3D prints. This upgrade is one of the first upgrades many 3D printing enthusiasts make to their Tevo Tarantulas.
Common Issues with the Tevo Tarantula Fan Duct
While the Tevo Tarantula is a capable printer, its fan duct can sometimes present challenges. Understanding these common issues is the first step toward improving print quality and reliability. Many users experience specific issues that can be directly linked to the fan duct’s performance, affecting print quality. The design and material of the fan duct itself can lead to problems. It’s important to know common issues, as these often can be avoided with a good fan duct.
Overheating
Overheating is a common issue, particularly when printing materials with high melting points, like ABS. The stock fan duct may not always provide sufficient cooling, leading to heat creep up into the hot end. This results in clogs, inconsistent extrusion, and poor print quality. You may notice stringing, blobs, and a generally rough surface finish on your prints. Inadequate cooling can cause the filament to soften prematurely in the hot end, causing it to jam. Also, the layers may not adhere properly. This can be prevented by upgrading the fan duct or by other cooling solutions. Proper cooling is especially important for printing with ABS and PETG.
Uneven Cooling

Uneven cooling occurs when the airflow from the fan duct is not distributed uniformly around the nozzle and the printed part. This results in warping and dimensional inaccuracies. You might notice that one side of your print curls up while the other remains flat. This is often caused by the fan duct design, where the airflow is directed more towards one side. Also, the part’s orientation on the print bed can also affect cooling uniformity. Solutions include modifying the fan duct to improve airflow distribution or reorienting the print job on the build plate. The impact of uneven cooling is especially visible in large, flat prints.
No Airflow
If the fan duct is blocked, damaged, or poorly designed, it may not deliver any airflow at all. Without adequate cooling, your prints will almost certainly suffer. If there is no airflow, the extruded plastic cannot cool and solidify properly, leading to a host of problems. You’ll see poor layer adhesion, warping, and stringing. A damaged fan duct is also a common source of airflow issues. Cracks or breaks can disrupt the airflow, rendering the duct ineffective. Moreover, the fan itself may fail over time, which also results in a lack of cooling. This is a frequent source of frustration for many 3D printing enthusiasts, and it must be addressed to avoid poor quality prints.
Tools and Materials for Tevo Tarantula Fan Duct Upgrades
Upgrading your Tevo Tarantula fan duct requires a few essential tools and materials. Having these prepared beforehand will make the upgrade process smoother and more efficient. Preparing your workspace with the correct equipment is key to successful upgrades. Ensure you have everything you need at your fingertips.
Essential Tools

You’ll need a small Phillips head screwdriver, a set of Allen wrenches (hex keys) that correspond to the screws on your printer, a pair of pliers for removing and manipulating small components, and possibly a hobby knife or utility knife for trimming or modifying the fan duct. Also, having a set of small files or sandpaper can be handy for smoothing edges or making minor adjustments to the fan duct to ensure a perfect fit. Consider having some painter’s tape or masking tape to hold parts in place during assembly. These simple tools will be enough to take apart, upgrade, and reassemble your Tevo Tarantula fan duct.
Recommended Materials
You’ll need a new fan duct, of course. There are many aftermarket fan ducts available online, made from various materials such as ABS, PETG, or even metal. It’s important to choose a fan duct designed specifically for the Tevo Tarantula. Also, consider some spare screws, just in case you lose any during the upgrade. If you plan to print your own fan duct, you’ll need filament. The filament type will depend on your printer, but ABS and PETG are common choices. A good quality fan duct will greatly improve your prints.
Step-by-Step Guide to Upgrading Your Fan Duct
Upgrading your Tevo Tarantula’s fan duct is a straightforward process that can significantly improve print quality. Following these steps will help you install a new fan duct efficiently and correctly. By carefully following these instructions, you can successfully upgrade your printer. Always ensure the printer is turned off and unplugged before starting any maintenance.
Removing the Existing Fan Duct

First, ensure your Tevo Tarantula is turned off and unplugged for safety. Then, locate the screws that hold the existing fan duct in place. Carefully unscrew them using the appropriate screwdriver. Gently remove the fan duct, taking note of how it’s connected and oriented. This will help you when installing the new fan duct. You may need to disconnect the fan wires, if applicable, from the control board before fully removing the old duct. Take pictures before removal if you’re unsure of how things go back together, it will help with reassembly.
Installing the New Fan Duct
Carefully align the new fan duct with the mounting points on your Tevo Tarantula. Secure it in place with the screws you removed earlier, tightening them firmly but not over-tightening them. Ensure the duct is correctly positioned to direct airflow towards the nozzle and the printed part. If the fan duct has any adjustments or movable parts, such as adjustable vents, set them to your desired position. Reconnect the fan wires to the control board if you disconnected them during the removal process. Once it is installed, it’s time to proceed to the next step.
Testing and Calibration
After installing the new fan duct, it’s essential to test its functionality and calibrate your printer. Turn on your Tevo Tarantula and heat up the nozzle to your printing temperature. You can start by printing a test object, such as a small cube or a calibration test print, to observe how the new fan duct performs. Check for any warping, uneven cooling, or other issues. If necessary, fine-tune your printer settings, such as fan speed, to optimize the cooling. If the prints show improvements, then you successfully upgraded your fan duct. Now, you should be good to go.
Optimizing Fan Duct Performance

Once you have installed your new fan duct, there are several ways to fine-tune its performance. Minor adjustments to fan speed and nozzle height can drastically improve print quality and overall reliability. Fine-tuning these parameters ensures that the fan duct works optimally.
Fan Speed Adjustment
Adjusting the fan speed is a simple but effective way to optimize cooling. Most 3D printers, including the Tevo Tarantula, allow you to control the fan speed via the printer’s control panel or the slicing software. Start with a fan speed of around 50% for the first few layers to ensure proper adhesion to the print bed, then increase the speed as needed. Increase the fan speed for smaller details and overhangs. However, be careful not to set the fan speed too high, as this can cause the printed layers to cool too quickly and warp. Experiment with different speeds and observe the results to find the optimal settings for your specific filament and print jobs. Often, this step can be completed by your slicer software, such as Cura.
Nozzle Height and Calibration
The nozzle height and calibration are also important factors that affect the cooling and the print quality. Ensure that the nozzle is properly calibrated and that the first layer adheres correctly to the print bed. Incorrect nozzle height can lead to poor layer adhesion and warping. Therefore, level your print bed accurately and calibrate the Z-offset to ensure that the nozzle is at the correct distance from the bed. If the nozzle is too close, it might scrape against the printed layers, while if it is too far, the filament will not adhere properly. Proper calibration is essential for the overall quality and longevity of your prints.
Maintenance and Troubleshooting

Regular maintenance and troubleshooting can help you keep your Tevo Tarantula fan duct in top condition. Performing routine checks can identify potential issues before they become major problems, and ensure continuous optimal printing performance.
Cleaning the Fan Duct
Regular cleaning is essential to prevent debris buildup that can obstruct airflow and reduce cooling efficiency. Use a brush, compressed air, or a soft cloth to remove any dust, filament scraps, or other particles from the fan duct. Pay special attention to the air vents and the fan blades. Ensure the fan duct is clean and free of obstructions. This simple step will help maintain optimal airflow. Cleaning should be a regular part of your printer maintenance routine. A clean fan duct contributes to better print quality.
Troubleshooting Common Problems
If you encounter print quality issues, such as warping or poor layer adhesion, troubleshoot the fan duct. Check for blockages or damage to the fan duct. Ensure that the fan is working correctly and that it is providing adequate airflow. If you find that the airflow is uneven, you may need to adjust the fan duct’s position or consider replacing it with a better design. You can use your hands to check the airflow. Regularly inspect the fan duct for any cracks or damage. Resolve these problems as soon as possible to maintain good print quality. By following these steps, you can quickly diagnose and address the most common fan duct related issues.
Safety Precautions

Safety should always be your top priority when working with 3D printers. Before starting any maintenance or upgrades, ensure that your Tevo Tarantula is turned off and unplugged to prevent any electrical hazards. Be careful when handling hot components, such as the nozzle and the hot end. Always allow the printer to cool down before attempting to remove or adjust any parts. Use appropriate tools and follow safety guidelines. Also, never leave your printer unattended during operation. By following these safety precautions, you can ensure a safe and enjoyable 3D printing experience.
In conclusion, upgrading and maintaining your Tevo Tarantula fan duct is a worthwhile endeavor that can significantly enhance your 3D printing experience. By understanding the fan duct’s role, common issues, and the steps involved in upgrading and maintenance, you can improve the quality, reliability, and longevity of your prints. Proper cooling is the foundation for good 3D printing, and now you have the knowledge to achieve it!