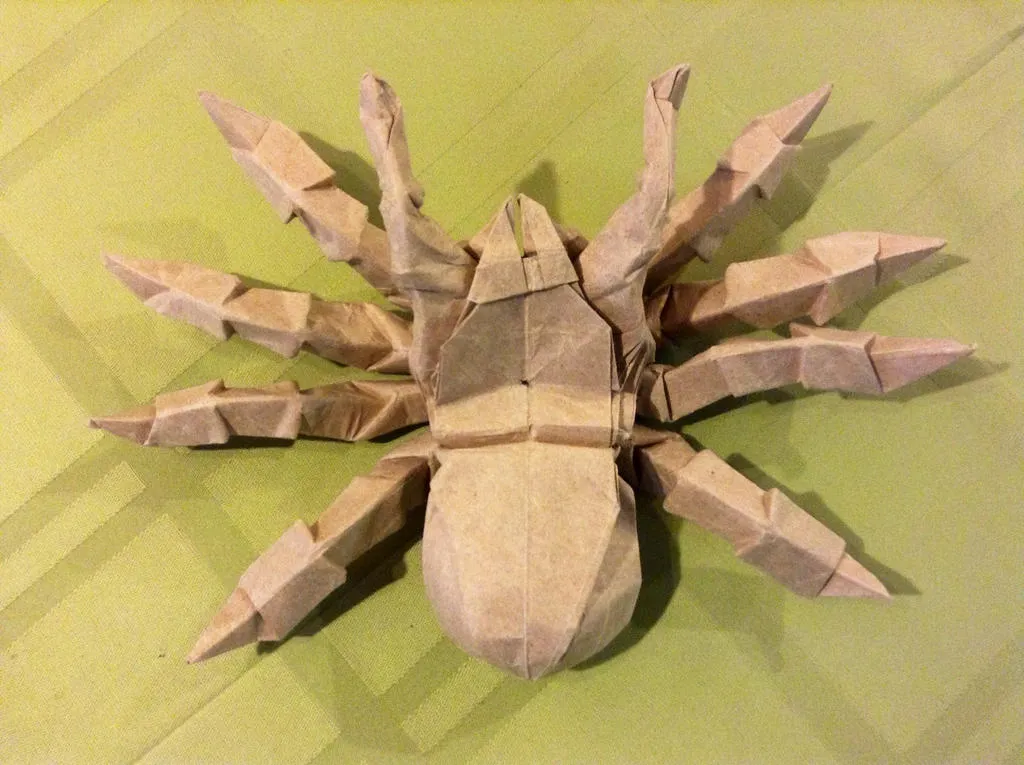
What is Tarantula Origami
Tarantula origami is the art of folding paper to create a realistic representation of a tarantula spider. This craft allows you to bring a fascinating creature to life using just paper and your hands. This intricate art form offers a unique blend of creativity and precision, providing a rewarding experience for both beginners and experienced origami enthusiasts. It’s a fantastic way to explore the beauty of geometric shapes and the patience required to create detailed forms. The process not only encourages creativity but also provides a satisfying sense of accomplishment as you watch a flat piece of paper transform into a three-dimensional spider. Whether you are looking for a new hobby, a unique gift idea, or simply a way to unwind, tarantula origami provides a captivating and engaging activity.
Materials Needed for Tarantula Origami
To begin your tarantula origami project, gather the necessary materials. The core element is the paper, which will be discussed further in the next section. You will also need some essential tools. A pair of fine-tipped scissors or a craft knife is useful for making precise cuts, especially if you want to add detailed features to your spider. A bone folder is also helpful to make sharp creases, it helps in defining the folds and giving your tarantula a polished look. Additionally, a ruler can be used to measure and ensure accuracy while folding. Finally, prepare a clean and flat surface to work on. This will provide a good base for your paper and make the folding process easier and more enjoyable. The quality of these materials contributes significantly to the final outcome of your origami tarantula, so choose them carefully.
Choosing the Right Paper

Selecting the right paper is crucial for successful tarantula origami. Consider the weight and type of paper for the best results. Origami paper, specifically designed for this art form, is an excellent choice. It is typically thin and foldable, which makes it easy to create intricate folds and detailed designs. The standard size of origami paper is 6 x 6 inches (15 x 15 cm), which is ideal for beginners. The weight of the paper affects the stability and ease of folding. Lighter paper is easier to fold, while heavier paper provides more structure to the finished model. You can experiment with different types of paper like metallic paper, duo-color paper, or patterned paper to add unique aesthetics to your tarantula origami. Ensure your chosen paper is not too thick to avoid difficulty folding it.
Essential Tools for Folding
Having the right tools can significantly enhance your tarantula origami experience. A bone folder or a similar tool is essential for making crisp and precise creases. This tool is designed to smooth folds and create sharp edges, which will make your tarantula model look neat and well-defined. Fine-tipped scissors or a craft knife can be very helpful when it comes to trimming excess paper or adding details like the small fangs. A ruler is also useful for measuring and ensuring accuracy when folding. Using a pencil to mark guidelines can improve the precision of your folds. Having these tools readily available will make the process of creating your origami spider easier and more enjoyable. With the correct tools, you can achieve a professional-looking result.
Step by Step Guide to Folding the Body
The body is the core of your tarantula origami. Begin by folding the paper in half diagonally to create a triangle, then unfold. Fold the top and bottom edges to meet the center crease, forming a kite shape. Next, fold the top two points downwards to meet the center crease. Repeat this on the back. Your paper should now resemble a diamond or a more pointed kite shape. From the base, fold the side edges toward the central vertical crease, creating two flaps. These flaps will form the initial shape of the tarantula’s body. Once this step is complete, you will see the basic outline of your spider’s body begin to form. Remember to work carefully and precisely to ensure the body is well-defined and structurally sound, this will make the rest of the folding process more enjoyable.
Folding the Legs

The legs are a significant feature of your origami tarantula. Start by folding the edges of each flap inward toward the center crease to create thin strips that will become the legs. You will need to create eight legs. These will provide a realistic appearance. Once the leg strips are folded, it is important to shape and position them correctly. Consider slightly bending the legs at different points to mimic the natural curvature of a tarantula’s legs. This bending should be done carefully to maintain the integrity of the paper. The position of the legs will impact the overall look of the spider. Experiment with different angles and positions to create a dynamic and lifelike pose. Take your time to fine-tune the shape and arrangement of the legs to achieve the most realistic and appealing look. The careful formation of the legs is what really brings your origami tarantula to life.
Creating the Head and Eyes
The head and eyes of your tarantula are vital for giving it character. Take a small portion of paper and fold it to form the head. You can shape it with a pointed or rounded design. This part requires precision, as it influences the creature’s overall expression. For the eyes, consider adding small details such as tiny, strategically placed folds or small dots. You can use a fine-tipped marker or pen to add the eyes after folding. Be sure to position the eyes correctly to add a lifelike gaze. Adjust the head’s shape and eyes’ placement to give your tarantula a unique look. The head and the eyes are where you can experiment with small changes to personalize your tarantula origami.
Adding Details and Finishing Touches
Adding details and the finishing touches truly brings your origami tarantula to life. Consider adding more detail to the body and legs. Using a fine-tipped marker, draw small hairs on the legs or create patterns on the body to replicate the spider’s natural appearance. You can also carefully use scissors to create small, pointed fangs. Experiment with different textures and features to make your origami unique. After completing the folding and detail work, carefully inspect your tarantula for any imperfections. Make any necessary adjustments to the folds or details. This step is important for ensuring the final product is polished and impressive. Your attention to details enhances the realism and appeal of your tarantula origami. A well-finished model reflects your dedication and creativity.
Tips for Perfecting Your Origami Spider

To perfect your origami spider, it is important to take your time and be patient. Start slowly, especially when you are a beginner, as rushing can lead to mistakes. Accuracy is essential; make sure all folds are precise and aligned. Using a bone folder is a valuable tip to create sharp creases. Practicing your technique is crucial for improving. Fold the same pattern several times to become more familiar with the steps and refine your skills. If you encounter difficulties, do not be discouraged. Refer to online tutorials or origami guides for clarification. Experimenting with different paper types can also influence the outcome of your project. Use various types and colors of paper and enjoy the process. Remember to have fun while folding, and the results will come.
Troubleshooting Common Folding Issues
Encountering difficulties is a common part of origami. One frequent problem is paper tearing. To avoid this, choose a paper weight that is suitable for the complexity of your design. When a fold is not aligned, refold it carefully, or use a bone folder to make it more precise. If your origami tarantula doesn’t look like the image, carefully review the folding steps. Try to identify where the mistake occurred. For complicated folds, slow down and try them multiple times. Consult instructional videos or books for additional guidance. If parts of the design are not holding shape, consider using a small amount of glue to secure them. Always remember that practice makes perfect. With each attempt, you will improve your folding technique and ability to solve any folding issue.
Displaying and Preserving Your Origami Tarantula
Proper display and preservation can help to showcase and protect your origami tarantula. To display your spider, consider placing it on a shelf or a desk, where it can be easily seen and admired. You can create a small diorama or scene to provide a more attractive setting. Use a glass display case to protect your origami creation from dust, sunlight, and handling. To preserve your origami, avoid exposing it to direct sunlight, as this can cause the paper to fade. Keep your origami in a cool, dry place, away from moisture. If you wish to protect your origami, you can consider using archival-quality materials or applying a sealant to the paper. By following these guidelines, you can enjoy your origami tarantula for years to come.