Embarking on your 3D printing journey with the Tevo Tarantula can be an exciting experience. This guide is designed to help you navigate the setup process, ensuring you can start creating your first 3D printed models quickly and efficiently. Whether you’re a beginner or have some experience, this step-by-step tutorial will provide you with the necessary knowledge to assemble, calibrate, and troubleshoot your Tevo Tarantula 3D printer. Let’s dive in and transform your ideas into tangible objects.
Unboxing Your Tevo Tarantula
The first step in setting up your Tevo Tarantula is to unbox it. Carefully unpack all components and lay them out. This initial step is crucial for ensuring you have everything needed to begin the assembly process. Make sure you have enough space to work and that the area is well-lit. Take your time to inspect each part for any signs of damage that might have occurred during shipping. Having all the parts organized will streamline the assembly process and make it more manageable.
What’s in the Box?
Your Tevo Tarantula should contain a variety of components. These typically include the frame parts (extruded aluminum profiles), the heated bed, the hotend assembly, stepper motors, control board, power supply, and various screws, nuts, and bolts. You will also likely find an SD card, some tools (such as Allen wrenches), and potentially a sample of filament. Double-check everything to ensure you have all the required items before proceeding to avoid unexpected delays during the setup.
Checking the Parts List

Refer to the parts list provided in the Tevo Tarantula’s manual. This list is your key to confirming that you have all the necessary components. Take a moment to compare the physical items to the list. It’s not uncommon for small parts to be overlooked during the unboxing. Ensure you have all the screws, nuts, and connectors, as these are essential for assembling the printer’s frame and connecting the electronics. Missing a small part can be a huge frustration so this step is important.
Tools You’ll Need
While the Tevo Tarantula often includes some tools, you may need additional ones. You’ll likely need a set of Allen wrenches (hex keys), a screwdriver, and possibly pliers. Having these tools readily available will make the assembly process easier and faster. It’s also helpful to have a pair of wire cutters or a hobby knife for trimming wires. Make sure you have a clean workspace to avoid losing any small screws or other parts. A well-organized workspace makes the assembly much more enjoyable.
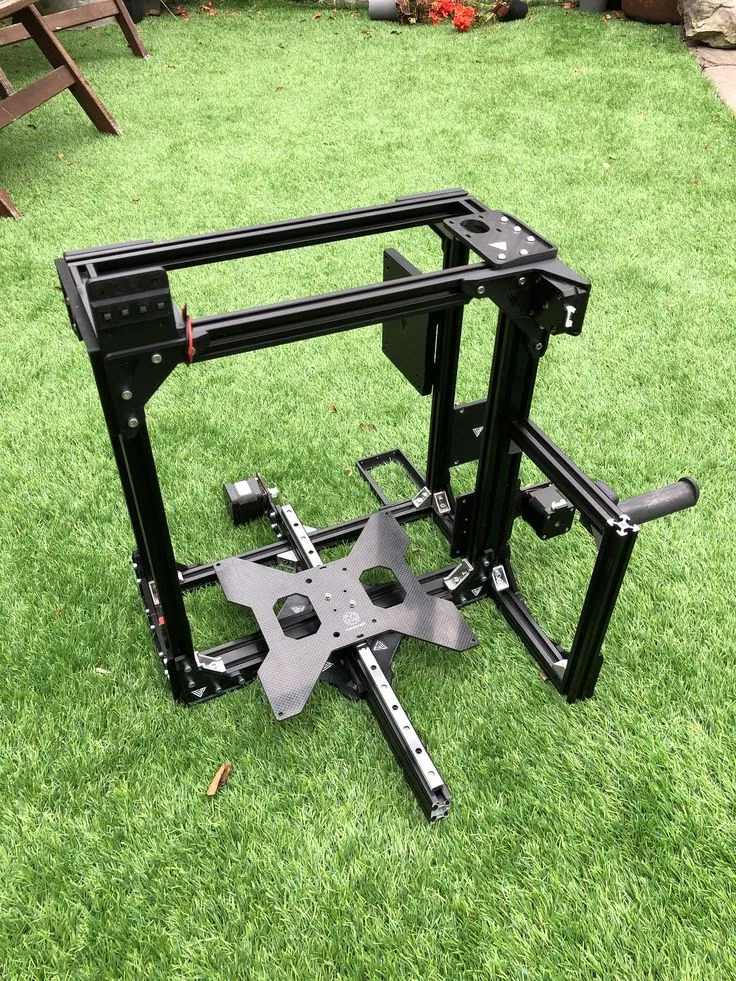
Assembling the Frame
The frame is the foundation of your Tevo Tarantula. It provides the structural support for the printer. Proper assembly is critical for ensuring the printer’s stability and the quality of your prints. Take your time during this step. The frame usually consists of extruded aluminum profiles that are joined together with corner brackets and screws. Tighten the screws securely but be careful not to overtighten them, as this could strip the threads.
Building the Base

The base is usually the first part of the frame you assemble. It provides the foundation for the entire printer. Follow the manual’s instructions carefully, ensuring that the frame members are aligned correctly. Use the appropriate screws to fasten the base components together. A square and level base is essential for a stable print bed. Double-check the base measurements and alignment before moving to the next step.
Attaching the Z-Axis
The Z-axis is responsible for the vertical movement of the print head. It’s typically made up of threaded rods and linear bearings. Securely attach the Z-axis components to the frame. Ensure that the rods are aligned correctly and that the bearings move smoothly. Proper Z-axis alignment is critical for the printer’s ability to create layers consistently. Carefully follow the manual’s instructions for attaching the Z-axis to avoid any binding or misalignment.
Mounting the X and Y Axes
The X and Y axes control the horizontal movement of the print head. These axes typically consist of belts, pulleys, and stepper motors. Attach the X and Y axis components to the frame, making sure that the belts are properly tensioned and that the pulleys are aligned. Belts that are too loose will result in poor print quality, while belts that are too tight can damage the motors. Ensure that the X and Y axes move freely and smoothly. Careful alignment and tensioning are critical for print accuracy.
Wiring the Electronics

Wiring the electronics is a crucial step. Proper connections are essential for the printer to function correctly. Take your time and double-check all connections to prevent any shorts or miswirings. It is essential to follow the wiring diagrams provided in the manual. Incorrect wiring can damage the electronic components and also poses a safety risk. Before applying power, always double-check that everything is connected correctly.
Connecting the Stepper Motors
Connect the stepper motors to the control board. These motors drive the movement of the X, Y, and Z axes, as well as the extruder. Refer to the wiring diagram to ensure each motor is connected to the correct port. The polarity of the wires is also important. Incorrect wiring can cause the motors to move in the wrong direction. Make sure the connectors are secure to prevent any disconnections during operation. Pay special attention to the wiring for the extruder motor.
Wiring the Hotend and Heated Bed
Connect the hotend and heated bed to the control board. These components are responsible for heating the filament and the print bed. The hotend requires careful wiring, as it gets very hot. Ensure that the thermistor and heater cartridge are connected correctly. The heated bed should also be connected with the proper polarity. Double-check all connections before applying power to avoid any electrical hazards or damage to the components. Proper temperature control is essential for successful prints.
Connecting the Power Supply

Connect the power supply to the control board and the wall outlet. The power supply provides the electricity to run the printer. Always use the correct voltage setting for your region. Ensure that the power supply is properly grounded. Incorrect wiring or voltage settings can damage the printer and pose a safety risk. Before plugging the printer in, carefully check all the wiring connections to the power supply. Ensure that the power switch is in the off position before plugging in.
Firmware and Calibration
Once the hardware is assembled, the next step is to configure the firmware and calibrate the printer. The firmware controls the printer’s movements and functions. Calibration ensures the printer is accurately aligned and ready to print. Proper calibration is essential to achieve good print quality. Take your time with this step, as it’s crucial for the printer’s performance.
Flashing the Firmware
The Tevo Tarantula may require you to flash the firmware onto the control board. This software controls the printer’s operations. You might need to download the firmware from the manufacturer’s website or use a custom version. Use an appropriate flashing tool to upload the firmware to the control board. The steps involved vary depending on the specific control board model. Follow the instructions carefully, and be patient. A successful firmware update is essential for the printer to function correctly.
Leveling the Bed

Leveling the print bed is one of the most critical calibration steps. A level bed ensures that the first layer of your prints adheres properly. There are usually leveling screws located under the print bed. Adjust these screws until the distance between the nozzle and the bed is consistent across the entire surface. Use a piece of paper or a feeler gauge to measure the distance. Many modern printers have auto-bed leveling, but even these require an initial manual adjustment. Proper bed leveling is crucial for print success.
Adjusting Z-Offset
The Z-offset is the distance between the nozzle and the bed when the Z-axis is at its zero position. This setting is important for ensuring the first layer adheres correctly. Adjust the Z-offset in the printer’s firmware or through its control panel. You want a slight squish of the first layer onto the print bed. The correct Z-offset prevents the nozzle from being too far away, which prevents the filament from sticking, or too close, which can damage the bed or nozzle. Fine-tuning the Z-offset can significantly improve your print quality.
First Print and Troubleshooting
After completing the assembly, wiring, and calibration, it’s time to perform your first print. Choose a simple test model, such as a calibration cube, to ensure everything is working correctly. Observe the printer throughout the process to identify any potential issues. This initial print will provide valuable insights into how your printer performs and highlight any adjustments that might be necessary. Be patient, and don’t be discouraged if your first print isn’t perfect.
Loading Filament

Load the filament into your Tevo Tarantula. This usually involves feeding the filament through the extruder and into the hotend. Make sure the hotend is preheated to the correct temperature for the type of filament you are using. The filament should feed smoothly through the nozzle. Any resistance or jams can lead to printing issues. Check the manufacturer’s recommendations for the filament temperature. Correct loading is essential for the printer to extrude the filament correctly.
Running a Test Print
Select a test print from your SD card or connect the printer to your computer. Start the print and monitor the process. Pay attention to the first layer, as it determines how well the print adheres to the bed. Observe the movement of the print head and the extrusion of the filament. A well-calibrated printer will produce a clean and consistent first layer. Watch the print as it progresses, and be ready to make any necessary adjustments. Successful prints are the result of careful setup and calibration.
Common Issues and Solutions
It’s common to encounter problems during the setup and printing process. Some common issues include bed adhesion problems, nozzle clogs, and incorrect layer adhesion. Bed adhesion issues can be resolved by leveling the bed, adjusting the Z-offset, or using bed adhesive. Nozzle clogs can be cleared by heating the hotend and manually extruding filament. Incorrect layer adhesion often indicates issues with temperature settings or print speed. Understanding common issues and solutions can greatly improve the user experience.
Maintenance and Upgrades

Maintaining your Tevo Tarantula and considering upgrades are essential to keep it performing at its best. Regular maintenance prevents problems and ensures that your printer runs smoothly. Upgrades can improve print quality and add new features. Taking care of your printer will extend its life and enhance your 3D printing experience.
Regular Maintenance Tasks
Perform regular maintenance to keep your Tevo Tarantula in good working condition. These tasks include cleaning the print bed, lubricating moving parts, and checking and tightening screws. Regularly inspect the nozzle for clogs and clean it as needed. Periodically check and tighten belts to maintain optimal tension. Cleaning and maintaining your printer will help to prevent issues and extend its lifespan. Keeping your printer clean makes it perform much better.
Upgrades for Improved Performance
Consider upgrades to enhance your Tevo Tarantula’s performance. Popular upgrades include a glass or PEI print bed for better adhesion, a direct drive extruder for improved filament feeding, and a more advanced control board for more features. Upgrading the firmware can also add functionality and improve print quality. Researching and implementing upgrades can make your printing experience more enjoyable and the quality of prints better. Always be sure to check that any upgrades are compatible with your printer.
Setting up your Tevo Tarantula 3D printer can seem daunting, but by following this guide step-by-step, you’ll be well on your way to creating amazing 3D printed objects. Remember to take your time during assembly and calibration, as this will ensure the best possible print quality. Embrace the learning process, troubleshoot any problems that arise, and enjoy the creative possibilities of 3D printing. With patience and persistence, you’ll be printing like a pro in no time!